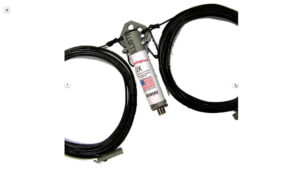
Every new QTH starts with one big question: what antenna should go up first? In this project, Professor Jim, N4BFR, installs his first antenna at the new QTH in Florida and starts big with a 160-meter off-center-fed dipole. It is a practical, real-world antenna build that covers safety, tree-line strategy, wire management, SWR checks, and first contacts on the air.
This was not just a “get wire in the air” day. Jim chose the antenna because he finally had enough room for a 160-meter antenna, then worked through the realities of hanging a long wire in trees, keeping the install safe, and getting the system usable fast.
Why Start with a 160m Off-Center-Fed Dipole?
At the new property, Jim finally had the space to try something he could not do before: a 160-meter off-center-fed dipole. That made this antenna a smart first project because it offered a multi-band wire solution that fits a wooded lot and gets a new station back on the air quickly.
- It takes advantage of available yard space.
- It is a practical first antenna for a new station.
- It can get you on the air before the station is fully optimized.
Safety First: Check the Trees, Wires, and Shot Direction
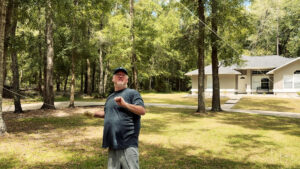
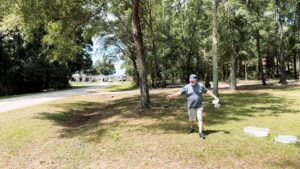
Before launching any line, Jim made a point to check for nearby wires and power lines. He says he carefully confirmed that he was not shooting near any power lines and kept every shot on a high arc and within his own yard. Later in the build, he became even more specific: because power lines were to the south and east, he only shot lines to the north or west.
That simple line may be the most important part of the whole project.
Tree-Line Tricks That Made the Install Easier
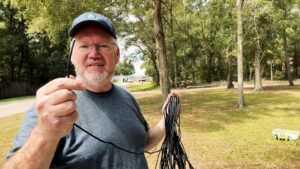
One of the smartest parts of the build was the way Jim used temporary lines to manage the wire around branches. He loosely looped a string around the antenna element so he could pull and adjust it while working through low branches, then remove that helper line later. He also worked directly off the spool so he would not lose the end in the tree while working alone.
The first antenna build starts in the trees, where line management matters as much as antenna design.
- A temporary helper string around the element can guide the wire around branches.
- Working off the spool keeps the line from disappearing into the tree.
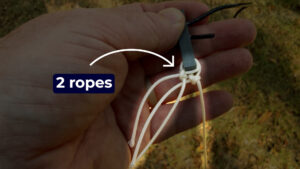
- A pull-up line and a pull-down line make future maintenance easier.
Jim specifically used two ropes at the end of the dipole: one to raise and hold the antenna, and another to bring it back down later without pulling directly on the wire element.
Real-World Problems: Tangled Line, Broken Spool, and Not Enough Paracord
Like most real antenna projects, this one did not go perfectly. After one launcher shot, the line fouled badly enough that the spool cracked, and Jim had to salvage about 70 feet of usable line before trying again. Later, he found that 100 feet of paracord was not enough to complete the continuous loop he wanted, so he temporarily supplemented it and tied in extra cord with loops, knots, and a wire tie for backup.
That is one of the most useful lessons in the video: your first install does not have to be perfect. It just has to work safely and get you moving toward a better station.
Checking Clearances at the New QTH
Once the antenna was up, Jim walked the entire run and checked the low points. One important trouble spot was where the line crossed the driveway. He estimated it was about 12 to 15 feet high, which was acceptable for now, even though he wants to raise it more later by lifting the center support.
That is another good reminder for anyone building a new station: the first version does not need to be the final version.
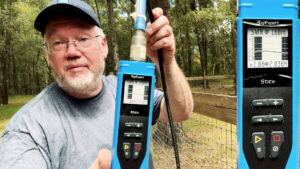
SWR Results Across the Bands
Before connecting the antenna to the station permanently, Jim checked it with an analyzer. Here is the summary from the build:
- 160m: about 1.8 to 2.0:1
- 80m: about 1.3:1 on the high side
- 60m: no go
- 40m: about 4.6:1
- 30m: about 2.3:1
- 20m: about 1.24:1 and rising
- 17m: no go
- 15m: about 3.5:1 at the high end
- 12m: around 4:1
- 10m: about 3.7:1 near 29.9 MHz
Those readings showed that the antenna still had room for adjustment. However, they also showed that the build was already usable, especially with a tuner.
On-Air Results: Good Enough Still Works
Even though the antenna was not fully resonant on every band, Jim still made contacts on 20 meters and 40 meters with the help of his antenna matcher. That is the real takeaway from the project: sometimes you do not need the perfect antenna. You just need the antenna you can use right now.
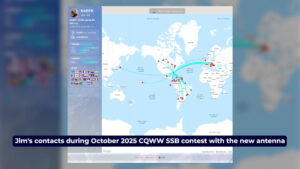
Sometimes you don’t have to have the perfect antenna to get on the air. You just need to have what you can use right now.
What This Antenna Build Teaches
- Choose the first antenna that fits your property, not the one that only works in theory.
- Safety checks matter as much as rope, wire, and hardware.
- Pull-up and pull-down lines make tree-supported antennas easier to adjust later.
- Problems like tangled line, broken spools, and short cord runs are normal.
- You can still make contacts before every number is perfect.
Related Reading
If you are still deciding what kind of antenna to build at your own QTH, read our guide on Different Types of Ham Radio Antennas. It covers handheld, mobile, and base-station antennas and gives you a broader view of what works in different spaces.
Final Thoughts
This first antenna at the new QTH was more than just a 160-meter project. It was the first real step in building a new station from scratch. Jim used the property well, solved problems as they appeared, checked the antenna with an analyzer, and got back on the air. That is the kind of practical ham radio project that helps both beginners and experienced operators.
If you are building out your own station, do not wait forever for perfection. Put up the antenna you can build now, learn from it, and improve from there.


")