So we talked about a couple of different antennas you can buy. Now, what about an antenna that you can build?
Maybe you’re a maker, maybe you just want to do something different, or maybe you want to save a few bucks. We’re going to build two single-band dipoles out of this roll of speaker wire.

Steps to Build Your Dipole Antenna
Here are some of the materials you need to start building your own homemade dipole antenna for ham radio.
- Roll of speaker wire
- Tools for measuring and cutting
- Balun (commercial or homemade)
- Dog bones for insulation (optional)
- 3D printed parts for homemade balun (optional)
1. Calculating the Length of the Dipole
When we’re building a dipole, there’s a formula you’re going to use to calculate the distance, and that formula is 468 divided by the frequency you want to operate on.
468 / Frequency = Length of each side of the dipole
For this exercise, we’re going to do two dipoles, one’s a 20M and one’s a 40M. So, I went ahead and made some notes on the lengths I need when I calculate out the 20M dipole. That 468 divided by 14.250 tells me each side needs to be about 16 1/2 ft. On the 40M dipole, each side needs to be 32 1/2 ft.
2. Building the 20M Dipole
So, we need our 16 1/2 Ft worth of wire to do our 20M dipole. There are a lot of different ways to measure it out.
All I did was spread these two chairs 16 and 1/2 ft apart, and I’m going to run the cable in between them. So we’ll tie some on this end and run it to the other chair. I’m going to leave myself about a foot extra slack, cut the cable.

Now, if you noticed, the full length of the dipole is just under 33 ft, but I only cut 16 1/2 ft. The reason I did that is that I’m using speaker wire; it has two conductors. I can just pull the conductors apart, and I have equal size conductors on each side of my dipole.
3. Preparing for Tuning
Now in my mind, having a little bit extra is not a bad thing because we are going to tune this, and we’re going to want to wrap it and adjust it. It’s a lot easier to take line off than it is to add extra wire.
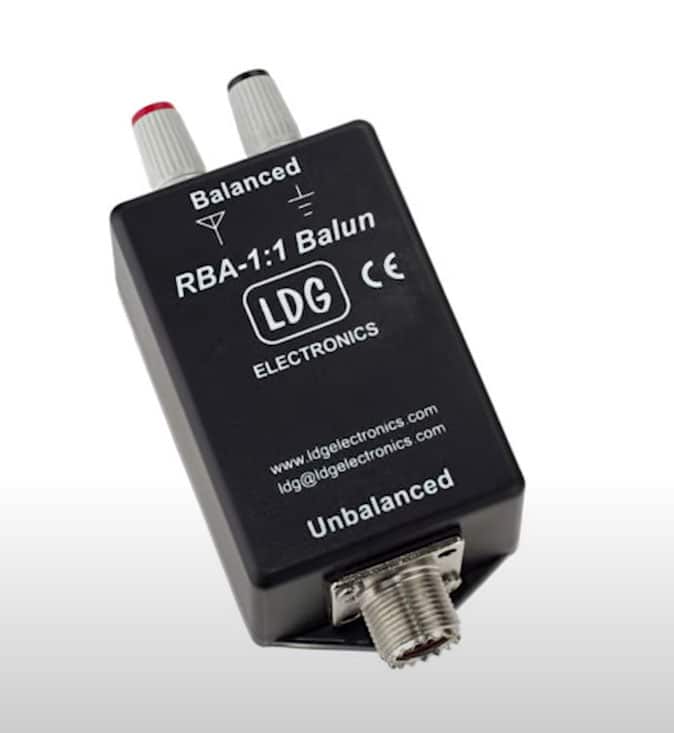
So next up, we’re going to connect up the wire in this antenna to a Balun. This is a commercial Balun from LDG, runs about 30 bucks. It’s got a current Balun in it, so it gives you a little extra protection from getting RF on your coax. But it’s easy to find and easy to use.
4. Connecting and Stripping the Wires
The first thing we need to do is strip the ends of these wires. Now, the gauge of the wire you choose does make a little bit of difference in the bandwidth you get, but the difference between like 14 gauge and 16 gauge is really not going to be significant for our application. This Balun is set for up to 200 Watts, so it’s great for running 100 watts in the park.

Now, to get the wire connected here, we just unscrew these terminal poles. There’s a little hole we can just sneak each end through the hole and tighten it down, or we can just wrap it around and tighten it down.
5. Final Prep Before Deployment
Alright, wrap these around the binding post and tighten them down. I’m going to come back and add some strain relief later with some wire ties, but for now, this is all I need to get connected.
Now is a good time to strip these two elements apart, and it’s really easy. We’ll just pull them apart and be ready to go. Alright, one more thing to do before we get to the park is to put some dog bones on this end of the antenna, so we’ve got some insulation between the tree, the rope, whatever we’re going to tie this off to.

This is really easy to do. These are 3D printed online; you can buy them for a couple of bucks at a hamfest. We’re going to just slide it through. We did not need to strip this; we’re just sliding it through, and we’re going to just whip stitch it around to hold it tight.
Building the 40M Dipole with a Homemade Balun
On the 40M antenna, I’m using a homemade balun. This is a 3D printed device that has an SO239 connector. I soldered up some wires and connected those up, made myself some terminals, so I can connect the ends of the antenna.

Take a look now; for the ends, we’re connecting up here, gives me a nice hole to run through for doing some strain relief. So, I’ll run these through each of the holes and strip the ends, and I’ll bind these ends onto the balun with some wing nuts.
Want to learn about the different types of ham radio antennas? Check our guide.
Benefits of Building Your Own Dipole
- Customization: Get the exact frequency you want without compromise.
- Cost-Effective: A roll of speaker wire can make several antennas.
- Choice of Balun: Choose or build a balun that fits your needs.
- Practical Experience: Gain hands-on experience in antenna building.
Conclusion
So what are some benefits of building your own dipole? Well, first, you get exactly on the frequency you want. You’re not making a compromise by doing it at multiple frequencies. Second, price is definitely a factor. We bought a roll of speaker wire; it was $30 for 200 ft, so we could make four or five more antennas and still have some left over.
Again, you can choose which balun you want, so there’s some customization there as well. And you can go out and work the world with just a dipole.
If you’re building a dipole antenna at home, a balun is an essential component. You can 3D print your own balun for this project. We’ve got the 3D print number for the balun from Thingiverse—a great resource for DIY projects. You can find the 3D model for the balun and the full instructions here: Thingiverse Balun 3D Print Model.
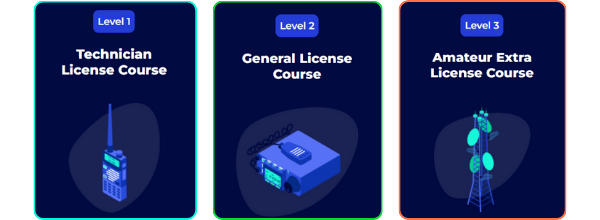
Head on over to hamradioprep.com to get started with our online courses. It’s the fastest, easiest, and most fun way to pass your ham radio license exam and get on the air!

")