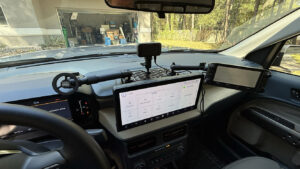
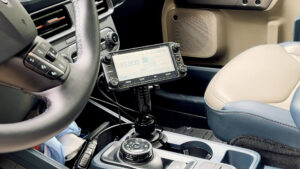
Looking for a tidy, passenger-friendly way to mount your ham radio control head in a truck? In this guide I show how I installed an Icom ID-5100 head in a 2025 Ford Maverick using the Bulletpoint RubiGrid system. This write-up covers the mount and positioning only so you can see the ergonomics and workflow before committing to the rest of the install.
Why switch from a cup-holder mount?
- Frees a cup holder for drinks or storage.
- Gains passenger space and removes clutter near the console.
- Improves ergonomics: the control head sits higher, closer to eye level.
- Modular: ball-and-arm system lets you add a phone mount or second device later.
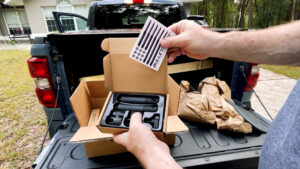
What’s in the Box (Kit Contents)
Disclosure
At Ham Radio Prep we buy our own equipment and we don’t have any deals to mention a specific brand.
Some links in this article are affiliate links—if you purchase through them, we may earn a small commission at no extra cost to you.
| All-Metal RubiGrid® Dash-Mounted Base – laser-cut metal grid platform that replaces the factory tray insert. | |
| Universal Spring-Loaded Phone Holder – expands to ~3.4″ with rubber pads for a secure grip. | |
| AMPS-style 20 mm Mounting Ball + Hardware – bolts anywhere on the grid. | |
| 6″ Carbon-Fiber + Kevlar Mounting Arm – light, rigid, and easy to tighten with integrated thumbscrews. |
Recommended Extras (nice to have)
-
Power driver (low torque setting), 10 mm wrench or small nut driver, painter’s tape/marker, scrap wood for drilling, and cable ties.
Step-by-step: Truck radio head install
- Remove factory rubber mat from the dash tray. Set aside (you won’t reuse it).
- Pry up the plastic dash tray using the included trim tool. Work slowly around the edge until the clips release.
- Separate the RubiGrid® top from its base by removing the 4 set screws. Keep screws handy.
- Test-fit the base on the removed tray to find the best position.
- With the base aligned, mark the 5 hole locations (score with the included screwdriver).
- Drill the 5 holes at the marks using the included drill bit. Place scrap wood under the tray while drilling.
- Bolt the lower RubiGrid® base to the tray: bolts drop from above; washers + nylon nuts go on the underside. Snug everything (don’t overtighten plastic).
- Reinstall the tray into the vehicle and press down firmly around the edge to snap it back in.
- Using the included screwdriver, install the 2 self-tapping screws into the “X” locations to secure the base to the tray (snug, not crushed).
- Dry-fit the RubiGrid® top to decide where you want devices. Remove it again.
- Install the AMPS 20 mm ball(s) in your chosen grid holes (bolts from top, washers + nylon nuts underneath). Tighten.
- Reattach the RubiGrid® top with the 4 set screws from step 3.
- Attach the 6″ carbon-fiber arm to the 20 mm ball, then add your phone holder and/or radio head mount.
- Final snug-down: During the first 30 days it’s normal to retighten the arm thumbscrews as everything settles.
Tip: Cable-manage mic and control leads with low-profile clips under the grid and along trim seams for a rattle-free install.
Safety & install tips
- Protect plastics: drill off-vehicle over scrap wood.
- Don’t over-tighten: snug lock nuts; avoid tray cracks.
- Visibility first: test sight lines before final tightening.
- Passenger comfort: verify knee and airbag clearance.
- Future-proofing: grid systems are modular—add GPS, APRS tablet, or camera later.
After the install: real-world use
Jim drove with the new setup over the weekend. The head is easy to read and reach, the phone sits cleanly on the grid, and the passenger side stays clear. He also reprogrammed local repeaters while testing—no wobble or rattle.
Frequently asked questions
Can I use this approach in other trucks/SUVs?
Will this void my warranty?
What if my ball mount conflicts with a brace?
How long does it really take?
Internal resources you’ll like
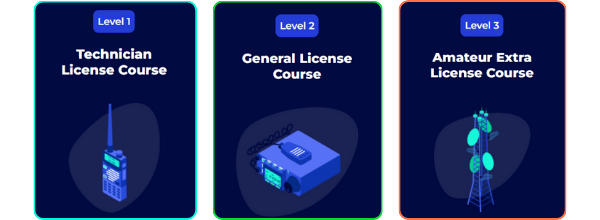
- New to mobile? Get licensed fast with Ham Radio Prep. Over 60,000 students have passed with us.
- Antenna ideas for home and mobile: The Different Types of Ham Radio Antennas
- Decode satellites with no license (receive-only): SatDump + RTL-SDR quickstart
Ready to take your mobile station further?


")