Calling CQ
One of the first things you need to learn in ham radio is how to call another station. One of the best ways to do that is “calling CQ”, which is especially used on HF frequencies.
Like any activity, ham radio has its own vocabulary and terms we use on the air.
“CQ” means calling any station. An easy way to remember this is “I seek you – so call me back.” When you call CQ, you are letting other stations know you are ready and waiting for them to respond back.

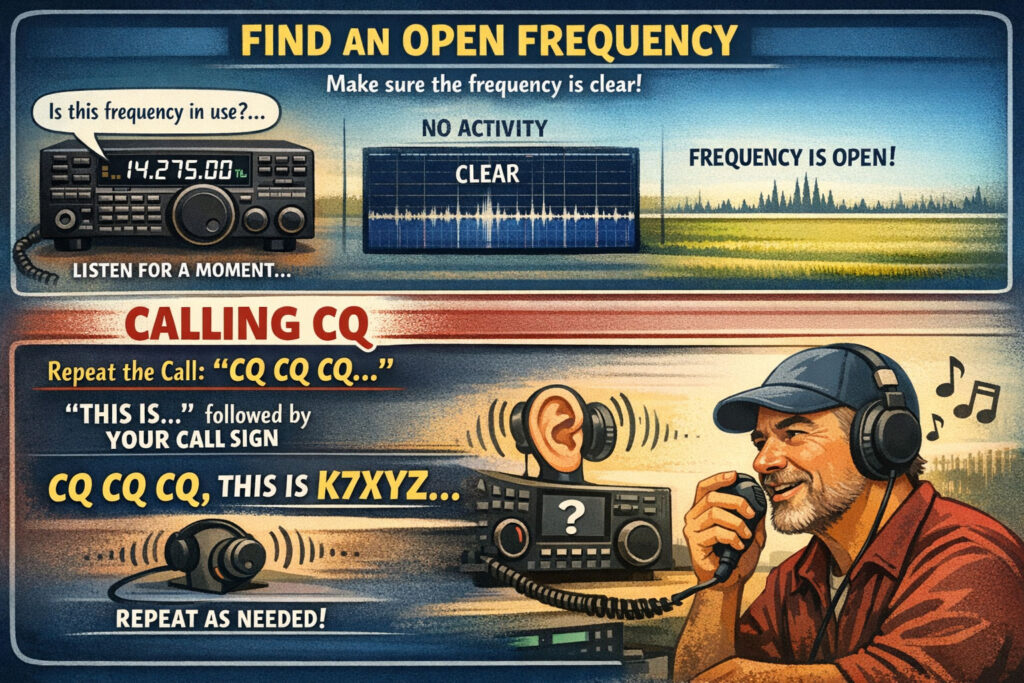
In order to call CQ, you first need to find an open frequency that is not in use.
Then, an effective way to get a response is to repeat “CQ” a few times, followed by “this is,” and your call sign, then pause to listen; repeat as necessary.
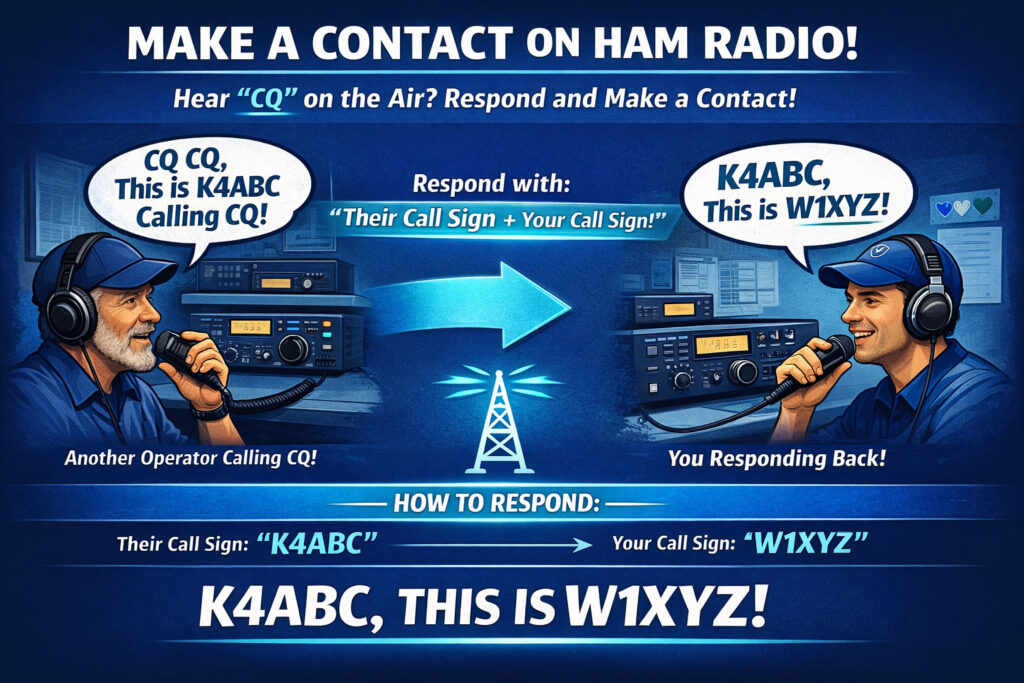
Instead of calling CQ yourself, an even easier way to make a contact is to find another station calling CQ and respond back to them! The way to respond to a station calling CQ transmit the other station’s call sign followed by your call sign.
If two stations transmit on the same frequency and interfere, it’s no problem. When interfering with each other, the stations should negotiate continued use of the frequency. Somebody’s gotta move, but keep it friendly!

How to Talk on Repeaters
Calling CQ is mostly used on HF. When calling for other stations on a repeater, the process is just a little different. You don’t typically call CQ on repeaters.
If you want to indicate you are available to talk to anyone on a repeater, you say the station’s call sign followed by the word “listening.”
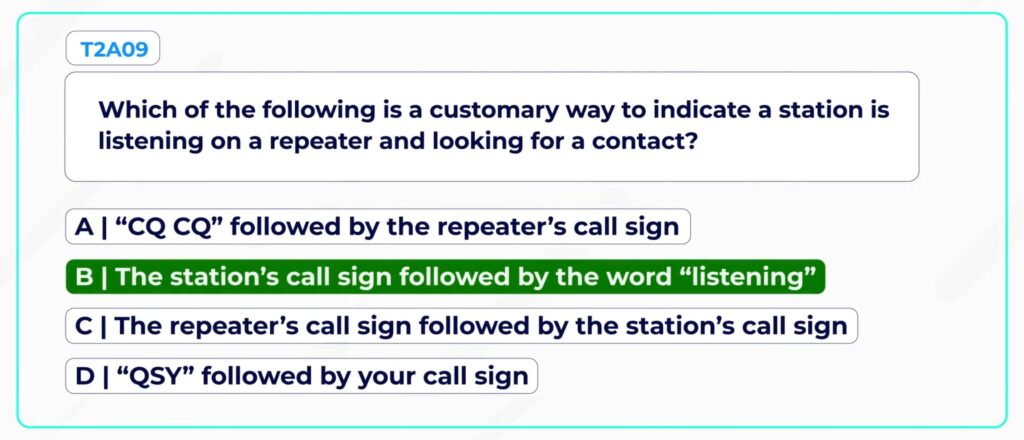
Just say your call sign, and then the word is listening.
If there is someone specific you are calling, and you know their call sign, say the station’s call sign, then identify with your call sign.
Repeater programming
Before you can make your first contact on a repeater, you need to program your radio to connect to the repeater.
First, you need to enter the receive frequency for the repeater, which is easy enough – just enter the stated frequency of the repeater.
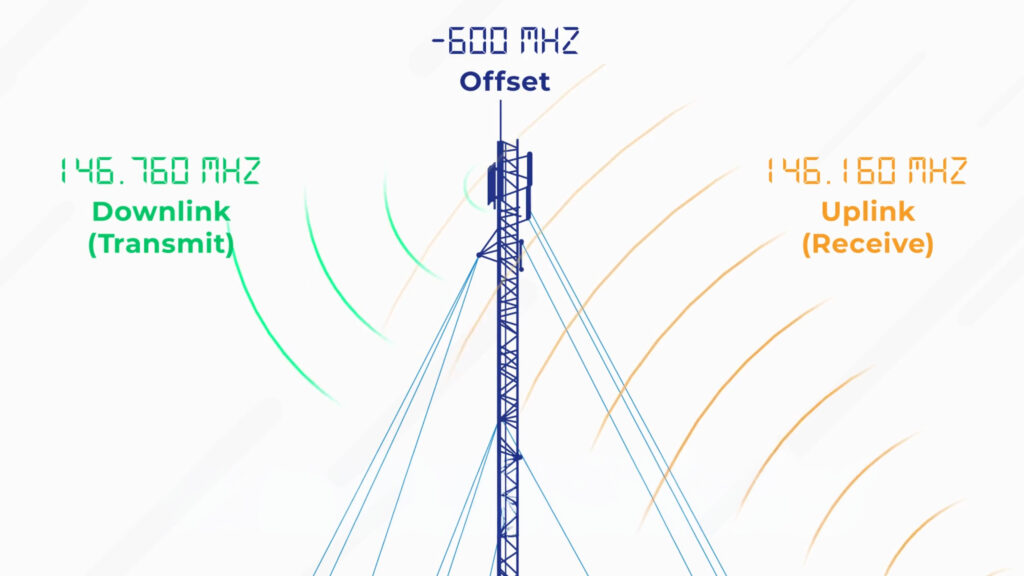
Next, you need to program the repeater offset.
Repeater offset is the difference between a repeater’s transmit and receive frequencies.
Repeaters use an offset to transmit and receive on different frequencies to avoid interference between the transmit and receive signals.
The good news is that the repeater offset is usually the same, depending on the band.
For the 70cm band, a common repeater offset is plus or minus 5 MHz.
For the 2-meters band, a common repeater offset is plus or minus 600 kHz.
In our example, the input frequency is 5 megahertz higher, so it would be entered as “plus 5.”
Tones
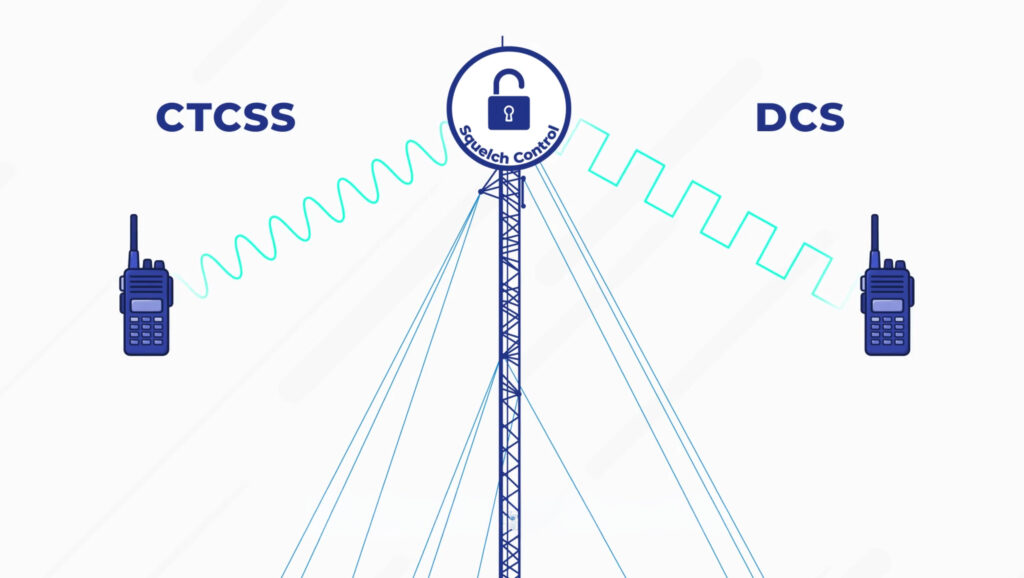
In most cases, before a repeater will accept your signal, it will also be looking for your radio to transmit a CTCSS tone, which is a sub-audible tone transmitted along with your voice to open the squelch of the receiver.
Think of the CTCSS tone like a key that unlocks the repeater.
![]()
CTCSS is an analog tone; some repeaters might instead use DCS – or digital-coded squelch – which unlocks the repeater using a digital code instead of analog, but it does the same thing.
Sometimes the CTCSS tone is called a PL tone, or “private line” which is an old-tech term, but it means the same thing.
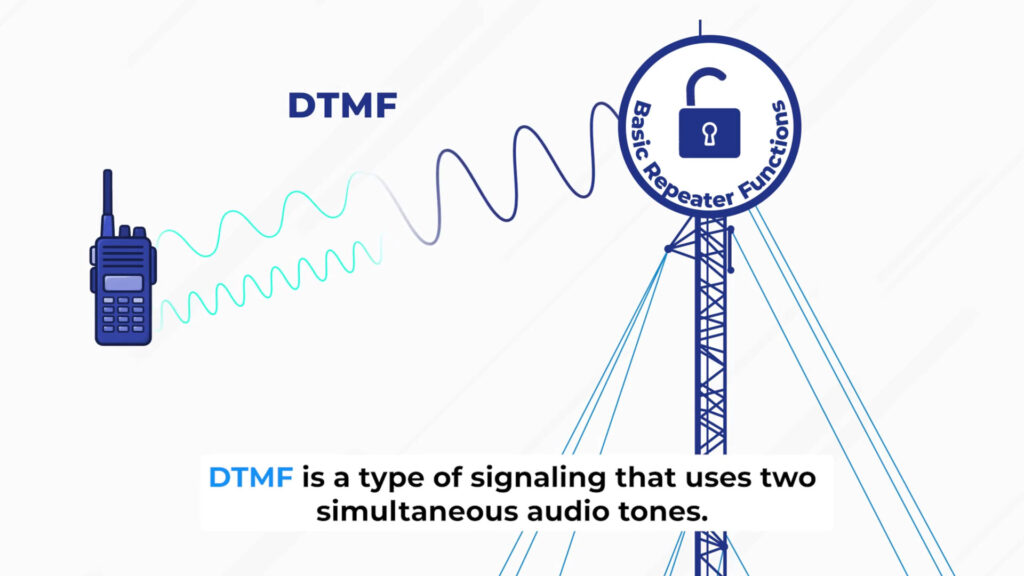
Repeaters can also be controlled remotely using DTMF, which stands for “dual-tone multi-frequency.”
DTMF is a type of signaling that uses two simultaneous audio tones. You might use this to control some basic repeater functions, like a feature to record your signal and echo it back for testing.
Here’s an exam tip: When a question asks about “pairs” of tones, remember that DT of DTMF stands for “dual tone!”
Troubleshooting
Let’s say you’re having some trouble talking on the repeater. What if you can hear a repeater, but it’s not relaying your signal when you transmit?
Some common reasons include:
- You’ve set the offset wrong on your transceiver, or
- You set the CTCSS tone or DCS code incorrectly.
For the “troubleshooting repeater access” question on the exam, know all these choices are correct.
What about people reporting that your FM transmission is “dropping out” when your voice peaks? No settings changes are needed; it probably just means you are talking too loudly. Talking really loudly or holding the microphone too close to your mouth can overload the radio.
Let’s talk about a common setting on radios called squelch. The squelch function allows you to mute the receiver audio when a signal is not present. The squelch setting blocks the annoying static sound from playing on your radio when no one is talking. Without squelch, the speaker on your radio would always play any static it picked up.
The goal is to set squelch high enough so you don’t hear static all the time, but not too high because you want your speaker to turn on if it receives a transmission.

Another helpful feature that most VHF/UHF radios have is the reverse function. The reverse function swaps the input and output frequencies. That allows you to listen on a repeater’s input frequency.
It’s a great way to check if you can hear someone on the repeater input, which means they are probably close enough to switch over to simplex for direct radio-to-radio communication.
It’s best practice to use simplex if you’re in range to avoid tying up the repeater.
It’s also possible to link multiple repeaters together to form a linked repeater network, which is a network of repeaters in which signals received by one repeater are transmitted by all the repeaters in the network.
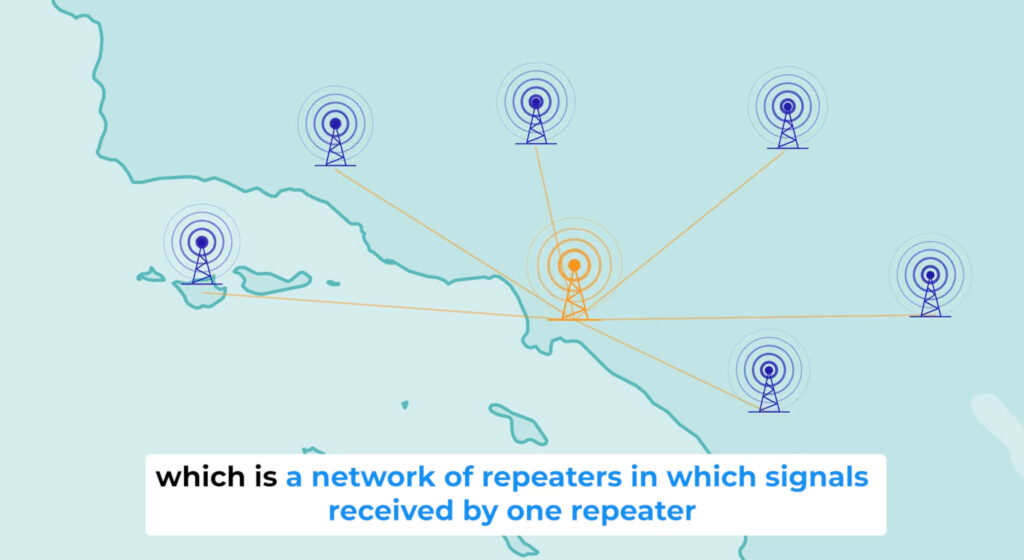
Linked repeater networks can greatly extend your range. Want to talk from Pensacola to Key West with a handheld? Just use the SARNet system in Florida. There are massive networks across the United States, like the Intermountain West system connecting Phoenix, Las Vegas, and Boise.
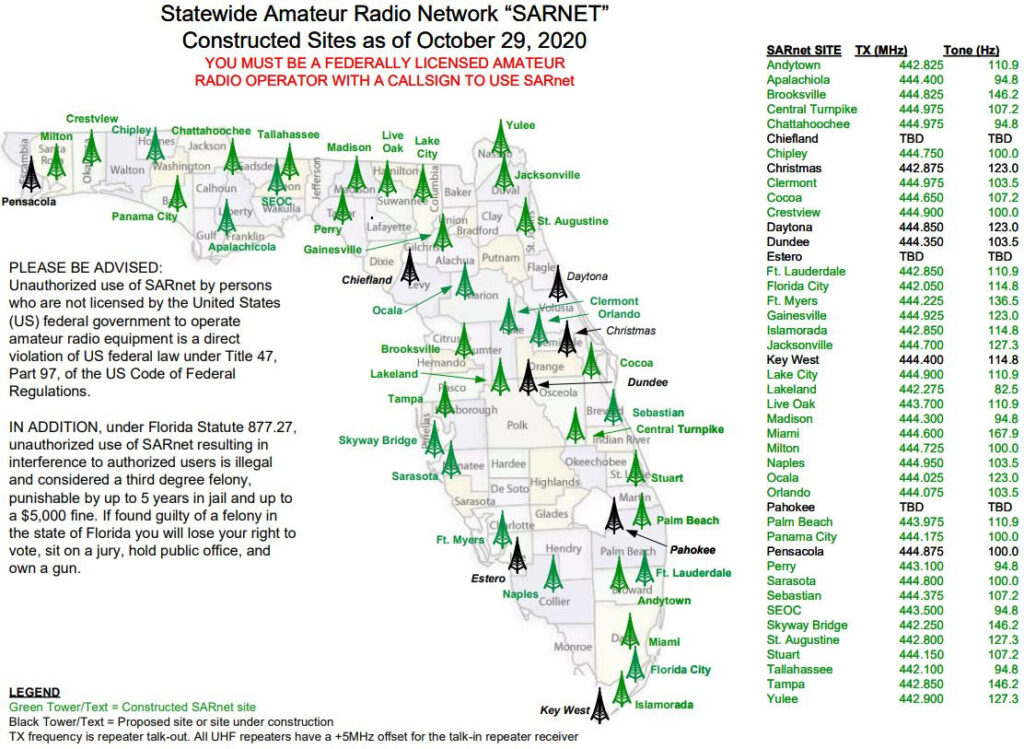
Statewide Amateur Radio Network, SarNet.com
Lesson Recap
In this lesson, we moved from theory to practice. You now know how to call “CQ” to contact other stations and how to make contacts on repeaters. You learned that to program your radio to talk on a repeater, you need 3 key details: the transmit frequency, the repeater offset, and the CTCSS tone – the key that unlocks the repeater. Finally, we touched on troubleshooting audio issues and some advanced settings as well.